![Food By Mom [Yuno Marioni]](https://substackcdn.com/image/fetch/$s_!XoPz!,w_80,h_80,c_fill,f_webp,q_auto:good,fl_progressive:steep,g_auto/https%3A%2F%2Fsubstack-post-media.s3.amazonaws.com%2Fpublic%2Fimages%2Fdd81a4bd-aabf-4b7b-8e7d-497bad885d15_720x960.jpeg)

![Food By Mom [Yuno Marioni]](https://substackcdn.com/image/fetch/$s_!XoPz!,w_36,h_36,c_fill,f_webp,q_auto:good,fl_progressive:steep,g_auto/https%3A%2F%2Fsubstack-post-media.s3.amazonaws.com%2Fpublic%2Fimages%2Fdd81a4bd-aabf-4b7b-8e7d-497bad885d15_720x960.jpeg)
Curry Bread (Kare Pan カレーパン)

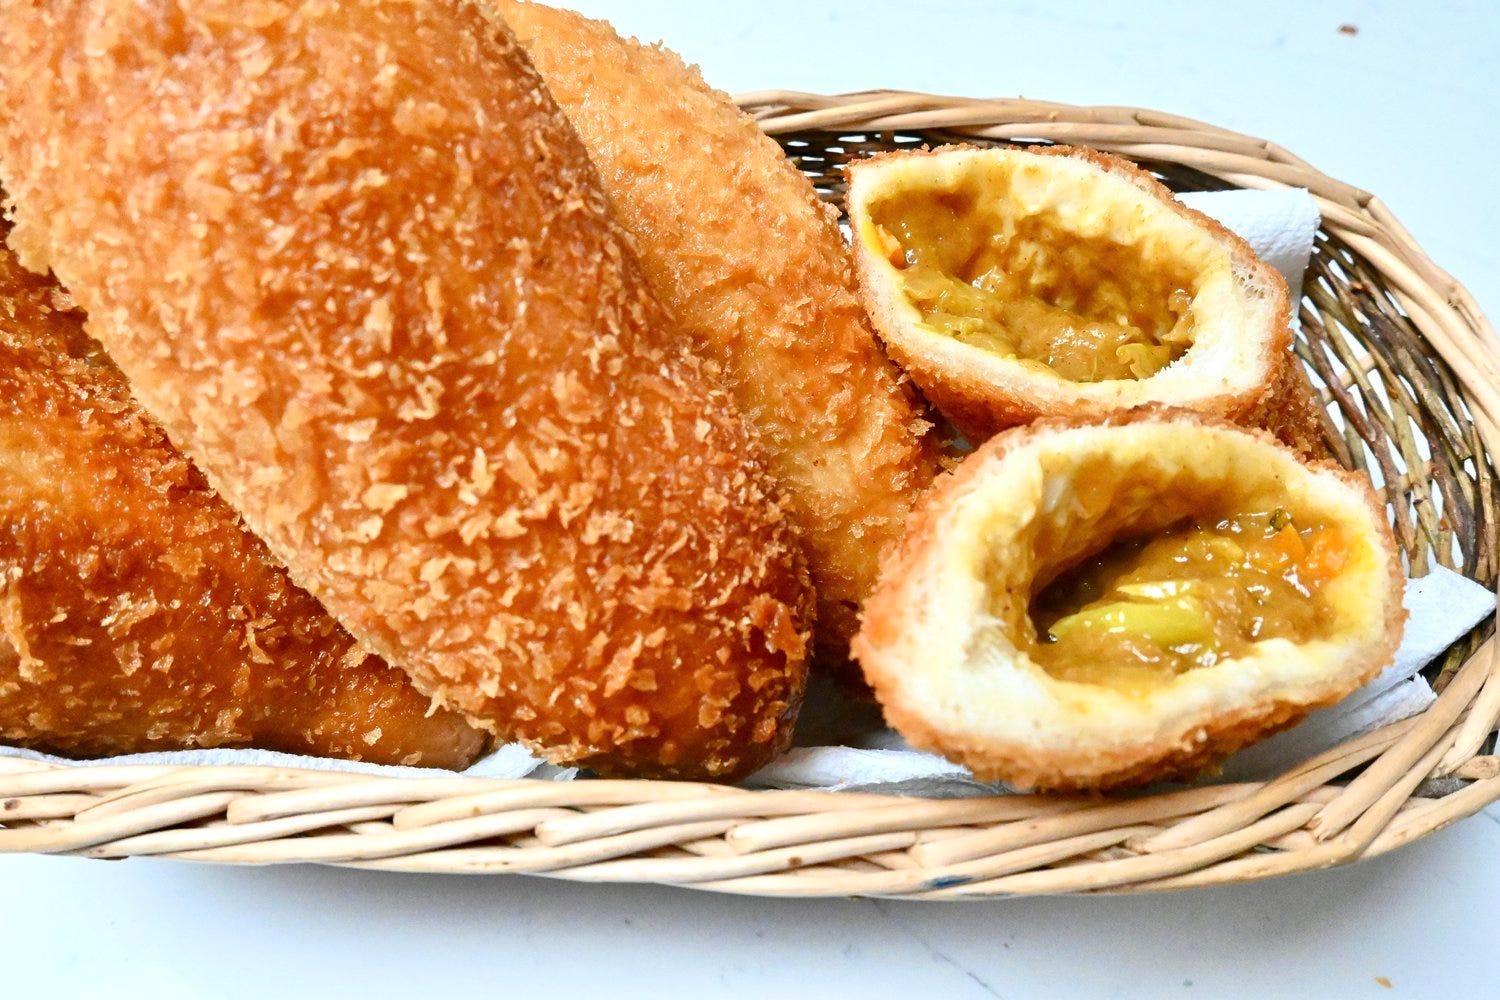
Curry bread (kare pan) is a beloved Japanese pastry you’ll find at bakeries all across Japan. The combination of crispy, deep-fried panko coating, soft and chewy bread, and a rich, savory curry filling is absolutely irresistible—especially if you’re a fan of Japanese curry! It’s also the perfect way to use up leftover curry in the most delicious way possible.
This recipe has been adapted from Okonomi Kitchen.
Tips:
It’s best to use leftover cold curry straight from the fridge when making kare pan. Avoid using hot or warm curry for the filling—it’ll be too runny and much harder to handle when shaping the bread.
Some recipes suggest proofing for 30~60 minutes after coating with panko, but I’ve found that the pinched seams often start to open up during that time. Once that happens, it’s hard to reseal, and it can get messy in the oil while frying. So, I usually let them rest for just 5~10 minutes—or fry them right after coating with panko.
You can store them in a ziplock bag or an airtight container in the fridge for 2–3 days, or freeze them for up to a month. To reheat, preheat the oven to 300°F and bake for about 10 minutes, or until warmed through.
Make 6
Ingredients
For dough:
150g bread flour
50g cake flour
3g instant yeast
3g Kosher salt
20g sugar
1/2C + 2 tbsp whole milk
1 tbsp butter, at room temp
For the curry bread:
about 2C leftover curry, cold (I use my veggie curry, but you can any Japanese curry of your choice!)
water or milk
1C panko
about 3C vegetable oil
Instructions
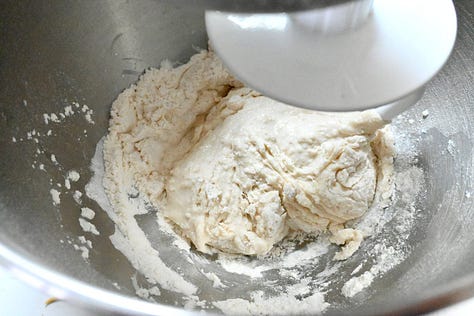
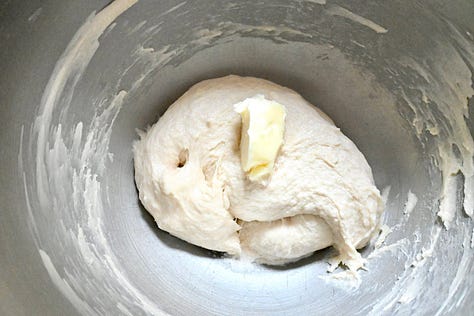
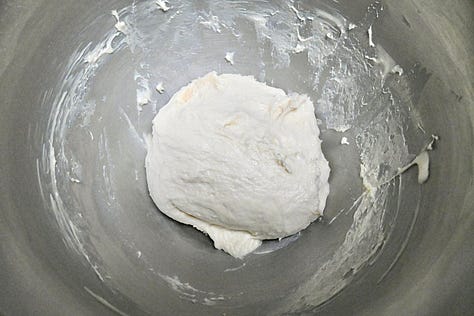
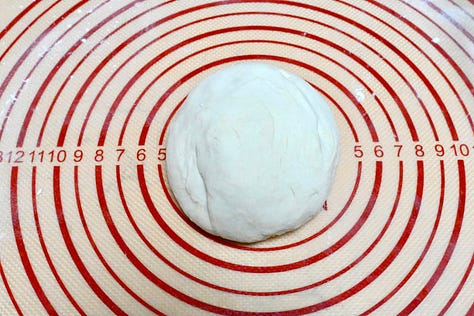
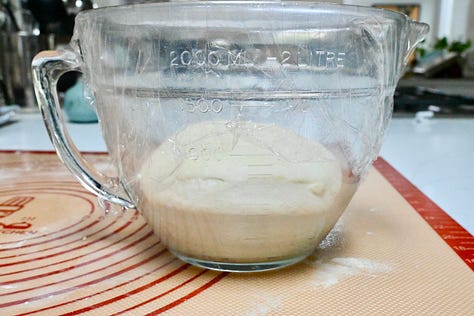
Add all of the dough ingredients to the bowl of a stand mixer, except the butter. Whisk a few times to combine. Knead using the dough hook—start on speed 2 for about 45~60 seconds, then increase to speed 4 and knead for about 8 minutes. Remove the dough from the hook, place the butter in the center, and continue kneading on speed 4 for another 5 minutes. Transfer the dough to a lightly floured surface and knead a few times by hand to form a smooth ball. Place in a bowl, cover with plastic wrap, and let it proof for about 1 hour, or until doubled in size.


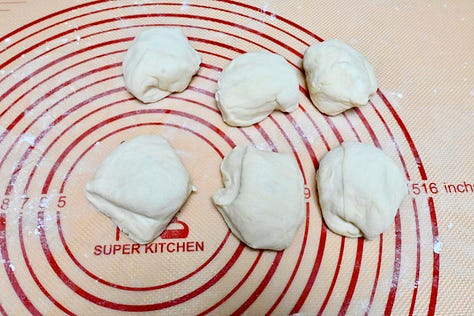
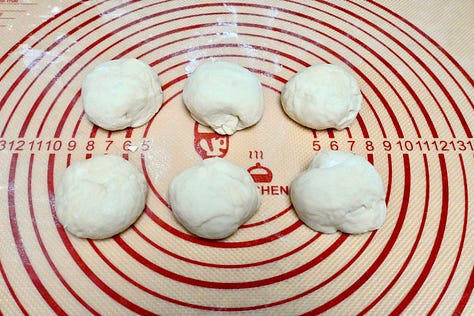
De-gas the dough and transfer it to a lightly floured surface. Divide into 6 equal pieces (about 62–64g each). Gently stretch and fold each piece a few times, turning as you go, then roll each into a smooth ball. Cover with a damp towel and let them rest for about 10 minutes to allow the gluten to relax.

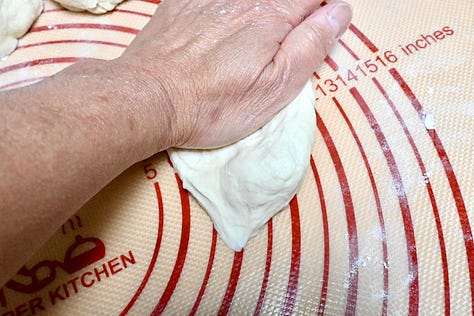
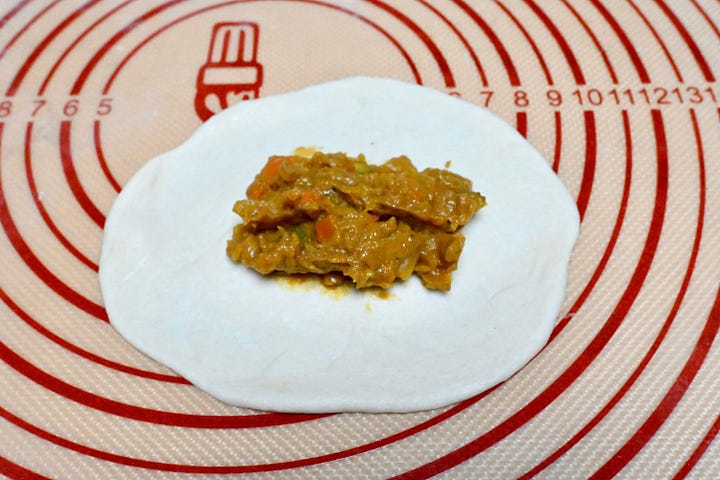
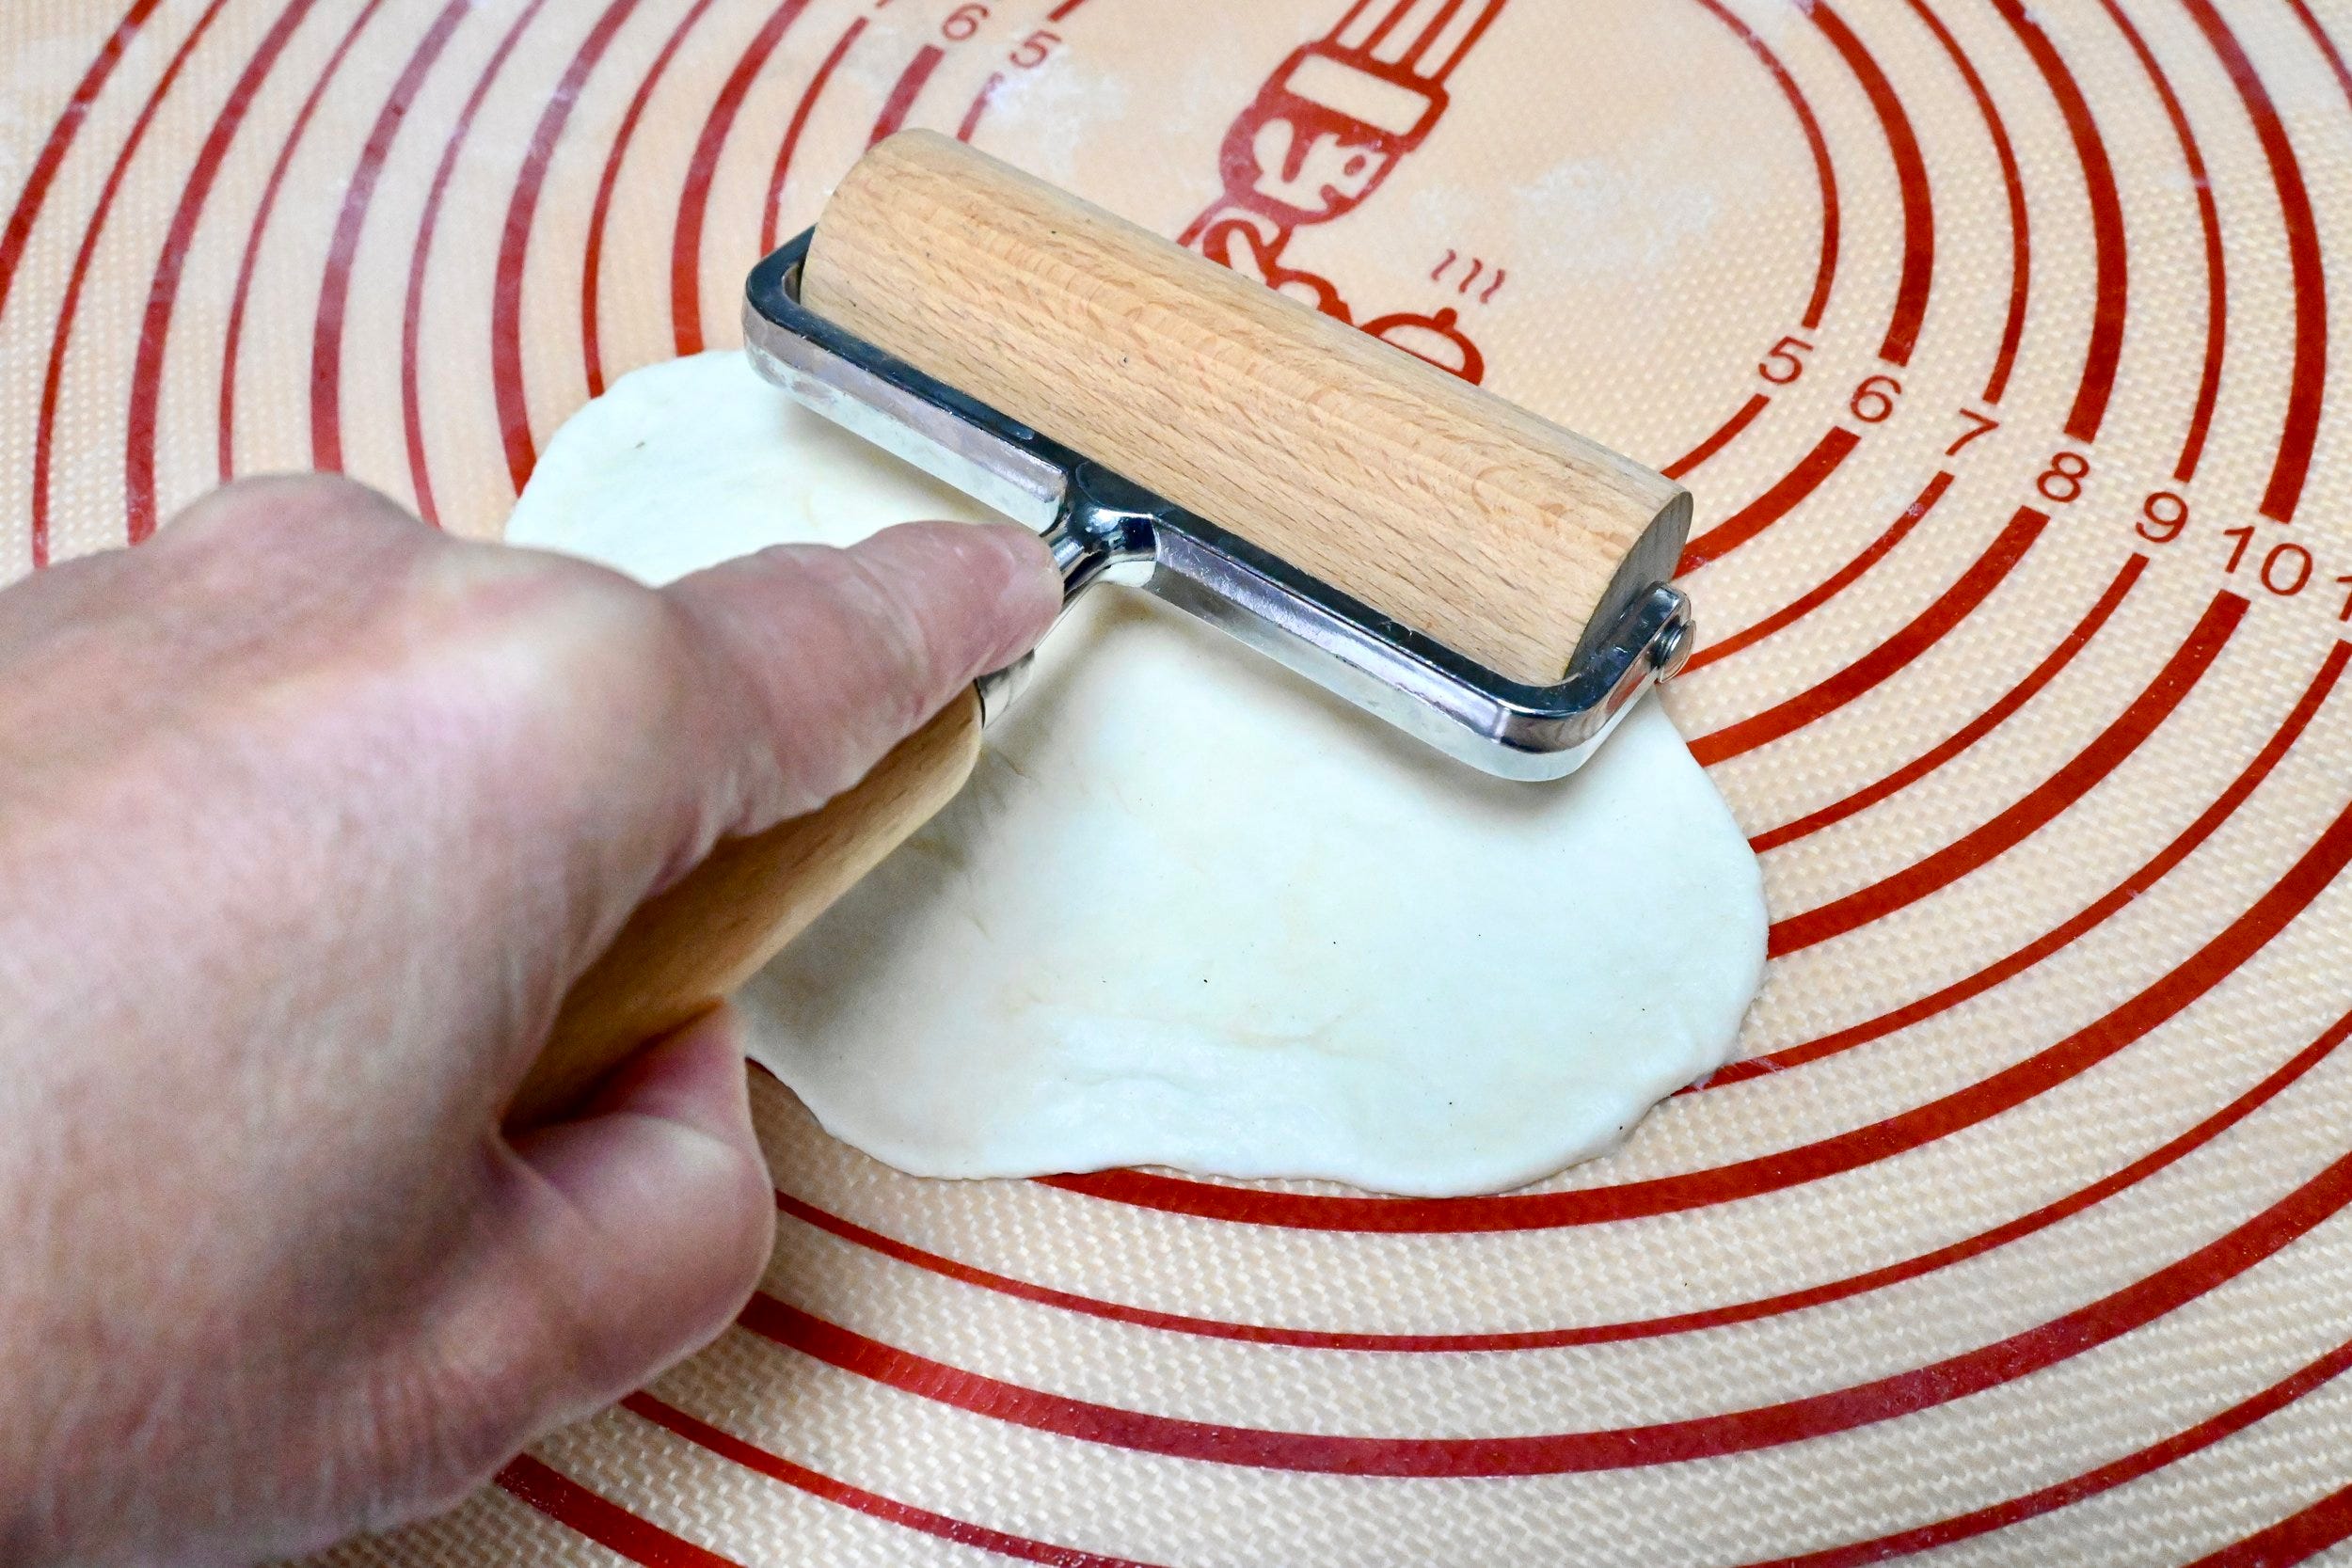
Roll one dough ball into an oval shape, about 4x5 inches. Starting from one end, roll about 1/3 of the dough toward the center, gently pressing as you go. Keep turning and rolling the dough—this helps create thinner edges, making it easier to seal later.

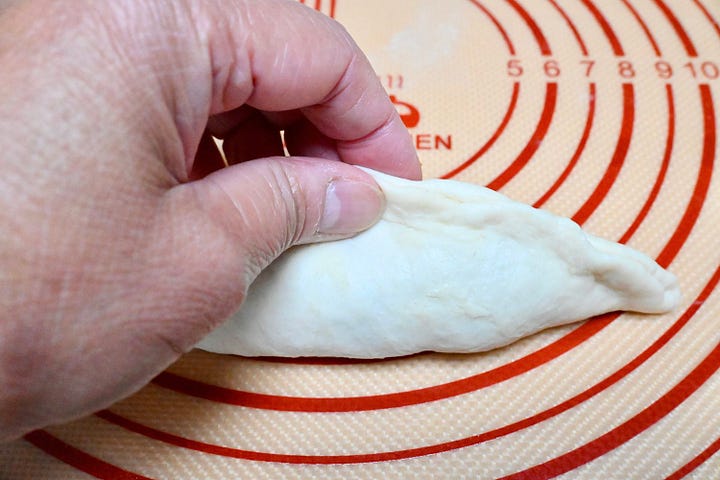
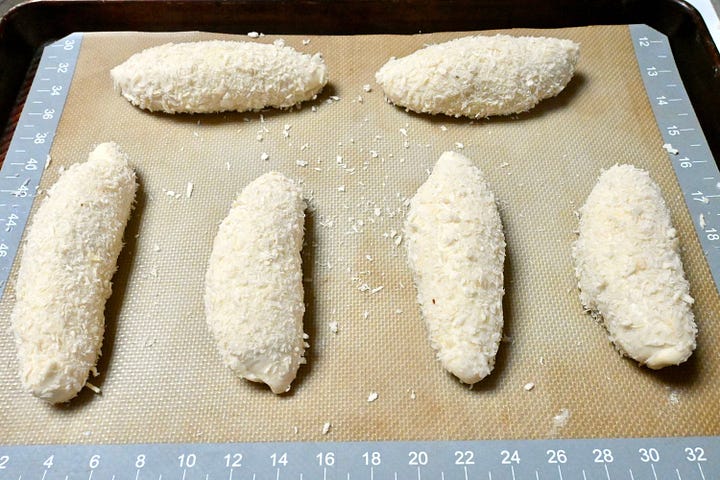
Scoop about 1~1 1/2 tbsp curry filling into the center of the rolled dough. Bring the top and bottom edges together, fold them up, and pinch tightly to seal—shaping it into a sweet potato-like oval. Place it seam side down on a silicone mat and cover with a damp towel. Repeat with the remaining dough balls. (Tip: Avoid overfilling—the curry should not touch the edges, or it may prevent proper sealing and could leak during proofing or frying.)
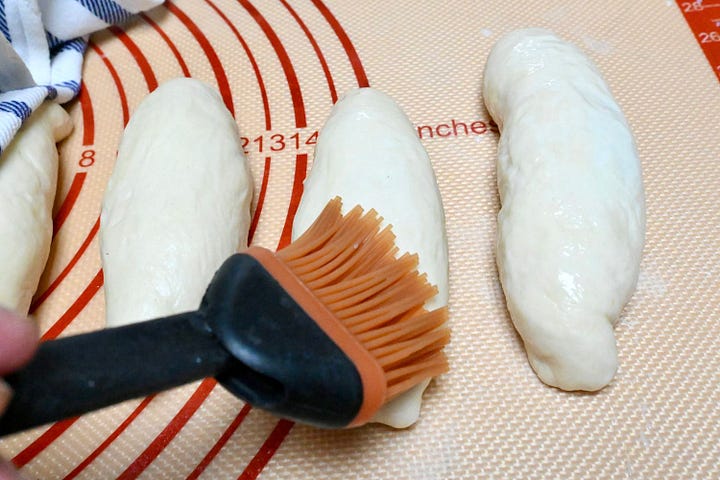
Using a pastry brush, lightly coat the entire dough with water or milk, then gently roll it in panko to evenly coat. Return it to the silicone mat and cover with a damp towel. Let it rest for about 10 minutes before frying. (Or, if you prefer, you can fry them right away—just be sure the dough is sealed well!)
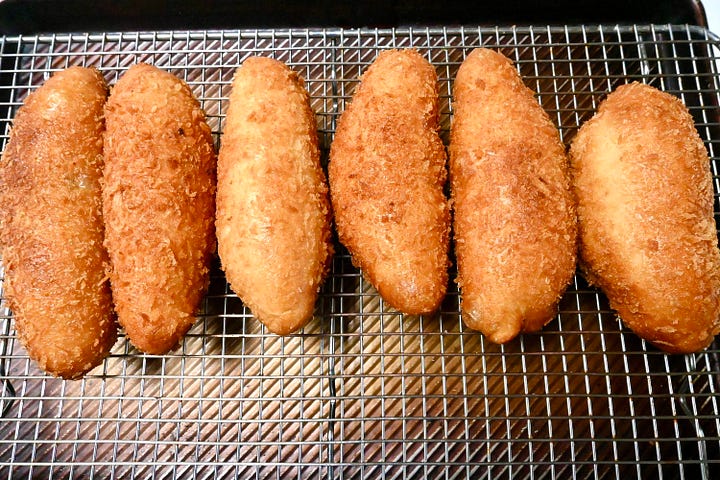
Heat oil to 320°F in a deep-fry pot. Gently drop 1~2 pieces of dough into the oil, seam-side down. Flip after about 5 seconds, then fry for 4~5 minutes, turning occasionally, until golden brown. Transfer to a wire rack to drain excess oil.


Disclaimer Note: We're all about sharing here! But please credit recipes and photos if you