![Food By Mom [Yuno Marioni]](https://substackcdn.com/image/fetch/$s_!XoPz!,w_80,h_80,c_fill,f_webp,q_auto:good,fl_progressive:steep,g_auto/https%3A%2F%2Fsubstack-post-media.s3.amazonaws.com%2Fpublic%2Fimages%2Fdd81a4bd-aabf-4b7b-8e7d-497bad885d15_720x960.jpeg)

![Food By Mom [Yuno Marioni]](https://substackcdn.com/image/fetch/$s_!XoPz!,w_36,h_36,c_fill,f_webp,q_auto:good,fl_progressive:steep,g_auto/https%3A%2F%2Fsubstack-post-media.s3.amazonaws.com%2Fpublic%2Fimages%2Fdd81a4bd-aabf-4b7b-8e7d-497bad885d15_720x960.jpeg)
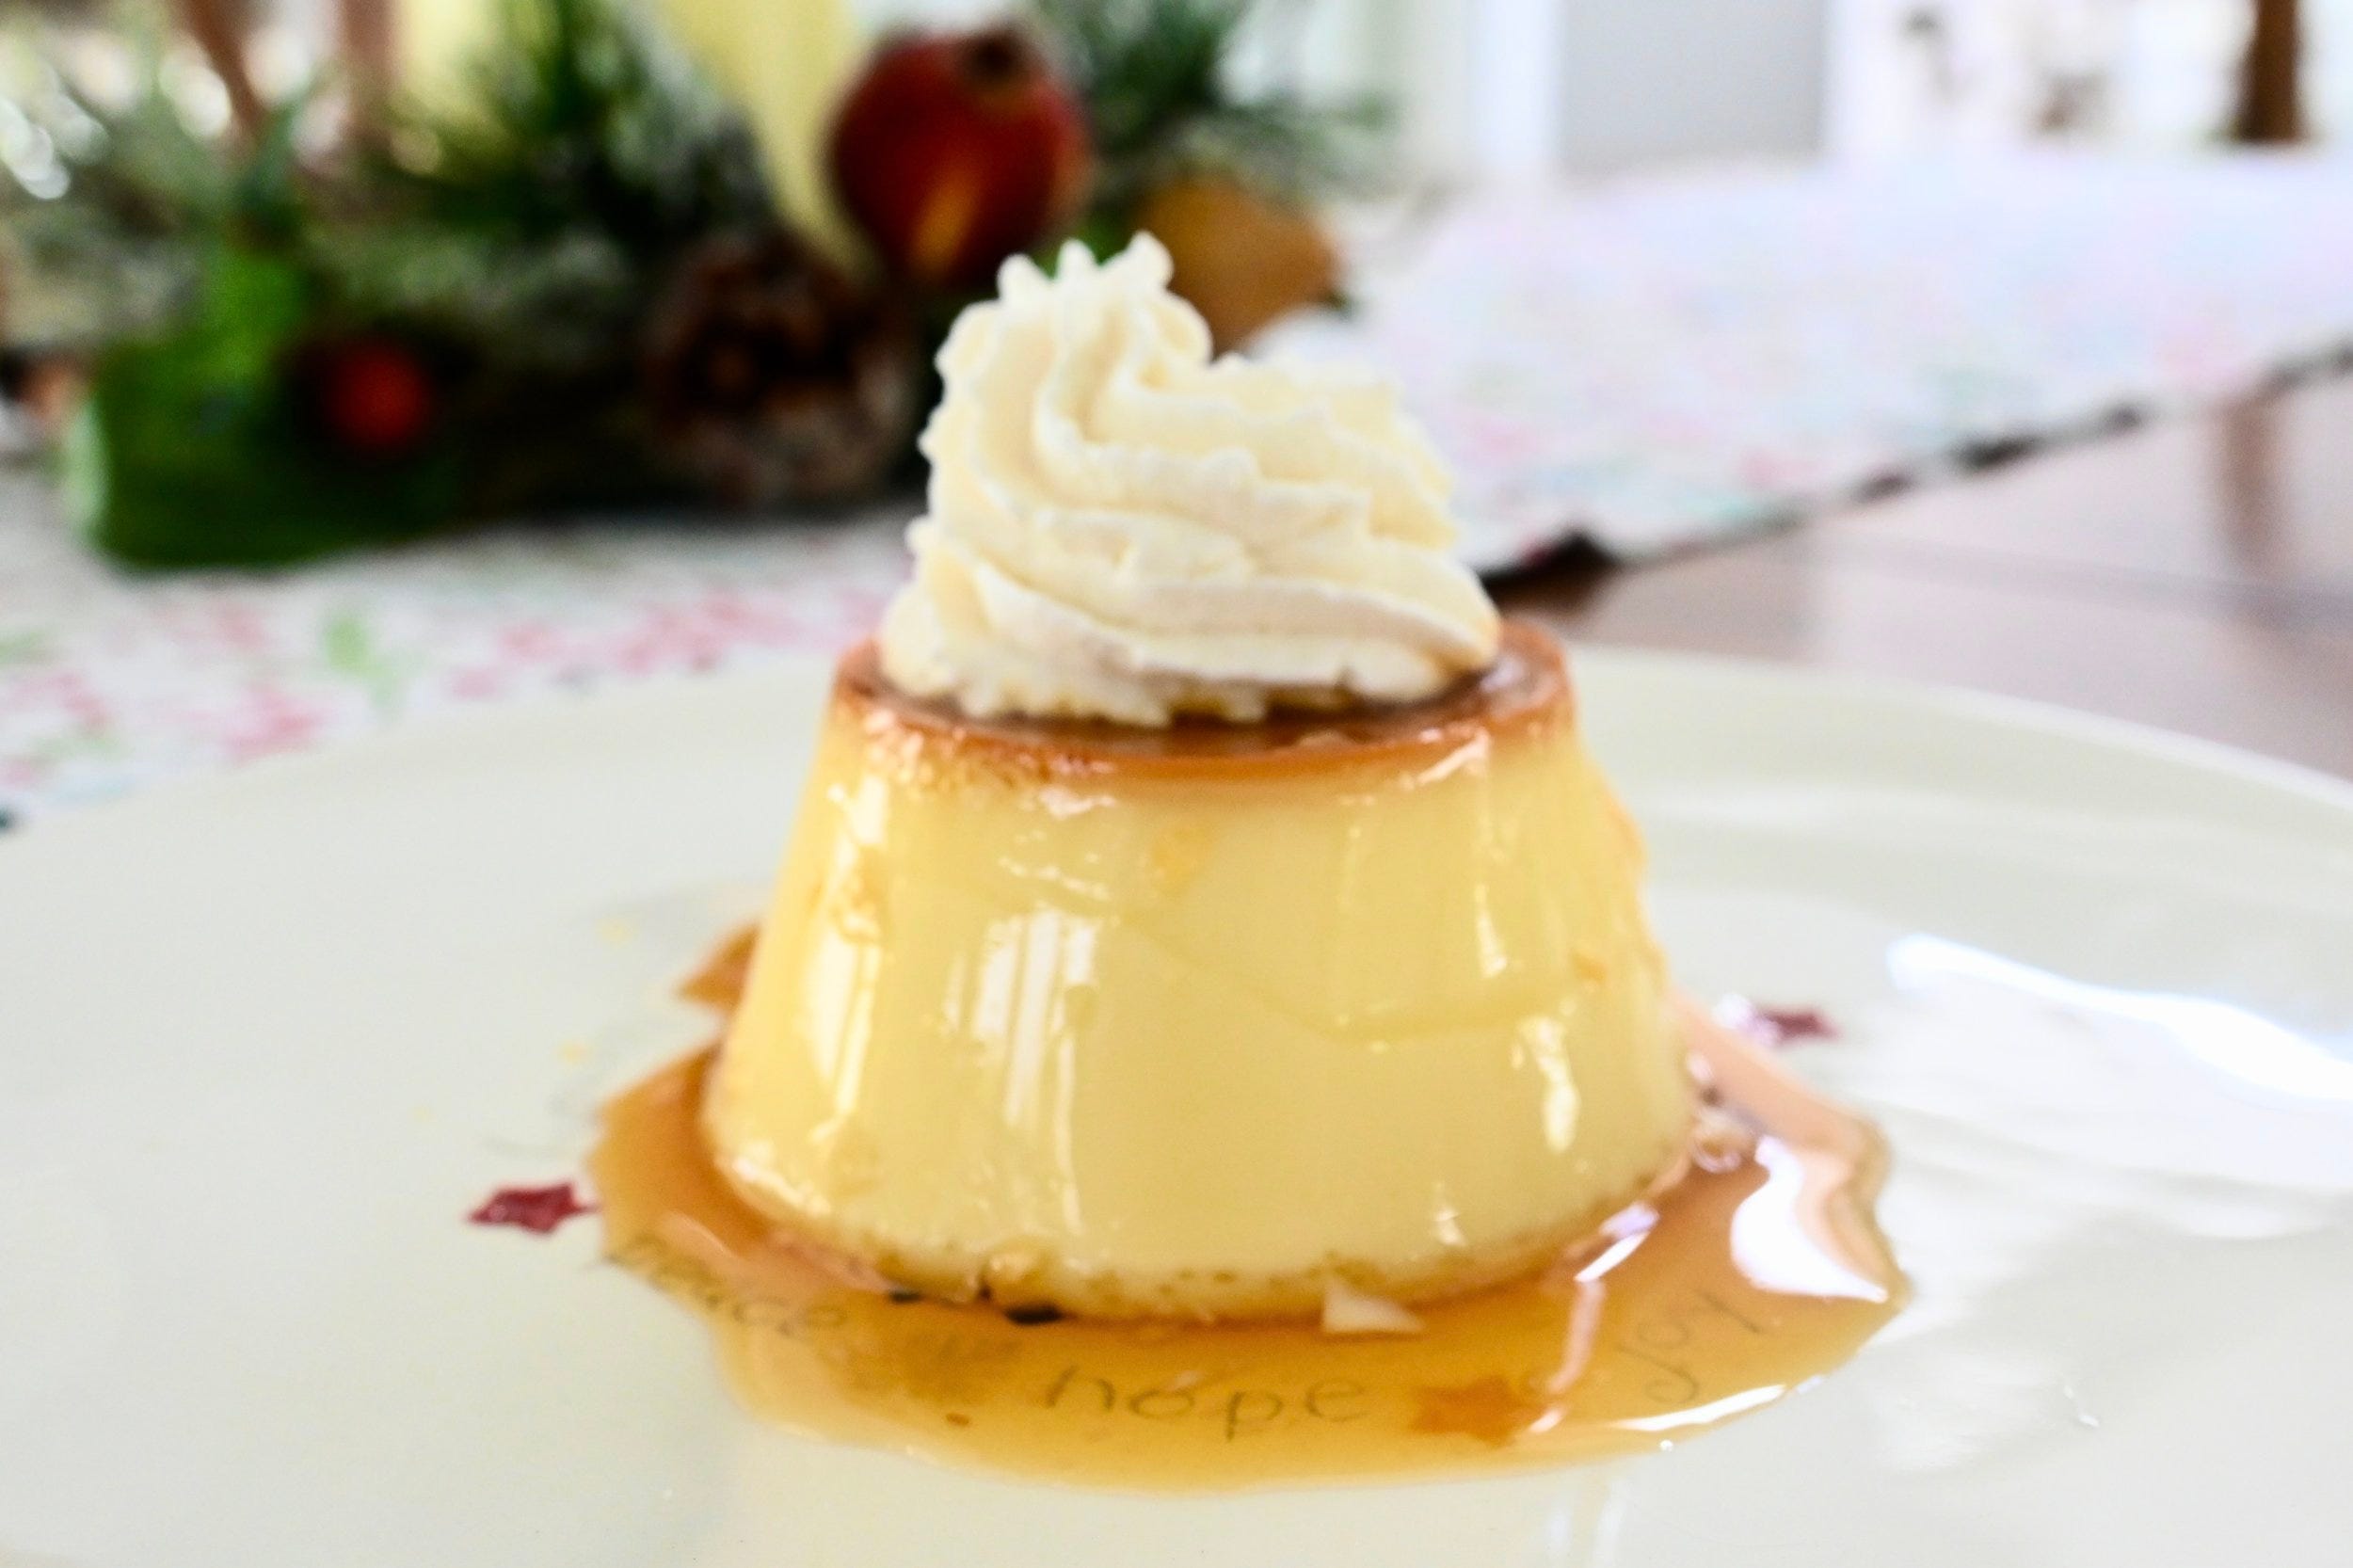
Grandma Ariko's Purin - Japanese Custard Pudding
Purin was my favorite dessert when I was a child, and it’s still one of my favorites today. With its silky texture and rich caramel flavor, it’s pure comfort and nostalgia in every bite.

Purin is a Japanese-style custard, and it was one of my dad’s and my favorite desserts when I was a kid. We especially loved my mom’s homemade purin, as well as the one from Morozoff, a beloved cake shop in Japan.
My mom used to make it on the stovetop just like chawanmushi, but I’ve found that baking it in the oven is easier and gives more consistent results. The recipe itself is simple and straightforward—nothing too fussy—but the key is watching the cooking time closely. The perfect purin should have a delicate, smooth, and silky texture—not porous or airy like a sponge.
Note: My mom said to add tiny bit of acid such as lemon juice or vinegar to the sugar water before cooking. This will prevent the caramel from crystallizing. You won’t taste lemon or vinegar at all! This is optional, but I highly recommend it.
Serve 4~6 depends on your mold size
Ingredients
For caramel sauce
1/3C sugar
3 tbsp water
1/2 tsp lemon juice or any acid - optional but I highly recommend it.
2 tbsp hot water
For custard
400 ml whole milk
3 eggs
60g sugar
1 tsp vanilla extract
Instructions
For caramel sauce:
In a small heavy-bottomed saucepan, combine the sugar and water (along with lemon juice, if using) over medium heat. Let the mixture cook undisturbed—don’t stir or swirl the pan—until the sugar begins to bubble. Once it’s bubbling and the sugar has fully dissolved, begin swirling the pan gently and frequently.
Continue cooking until the mixture turns a deep amber color. Remove the pan from the heat and carefully add 2 tbsp hot water—do this very slowly, as the syrup will bubble up vigorously! Be cautious, as the caramel is extremely hot.
Swirl the pan constantly, or stir gently with a heatproof silicone spatula, until the caramel and water are fully combined into a smooth syrup. Immediately pour the caramel into your custard molds. Let the caramel set at room temperature while you prepare the custard.


For custard:
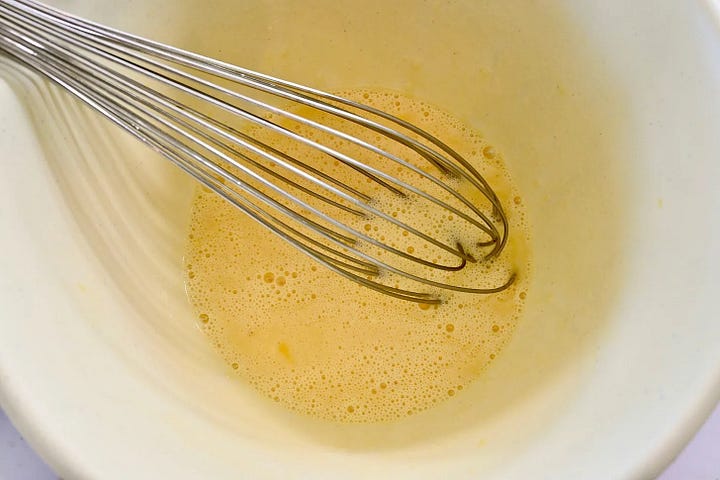
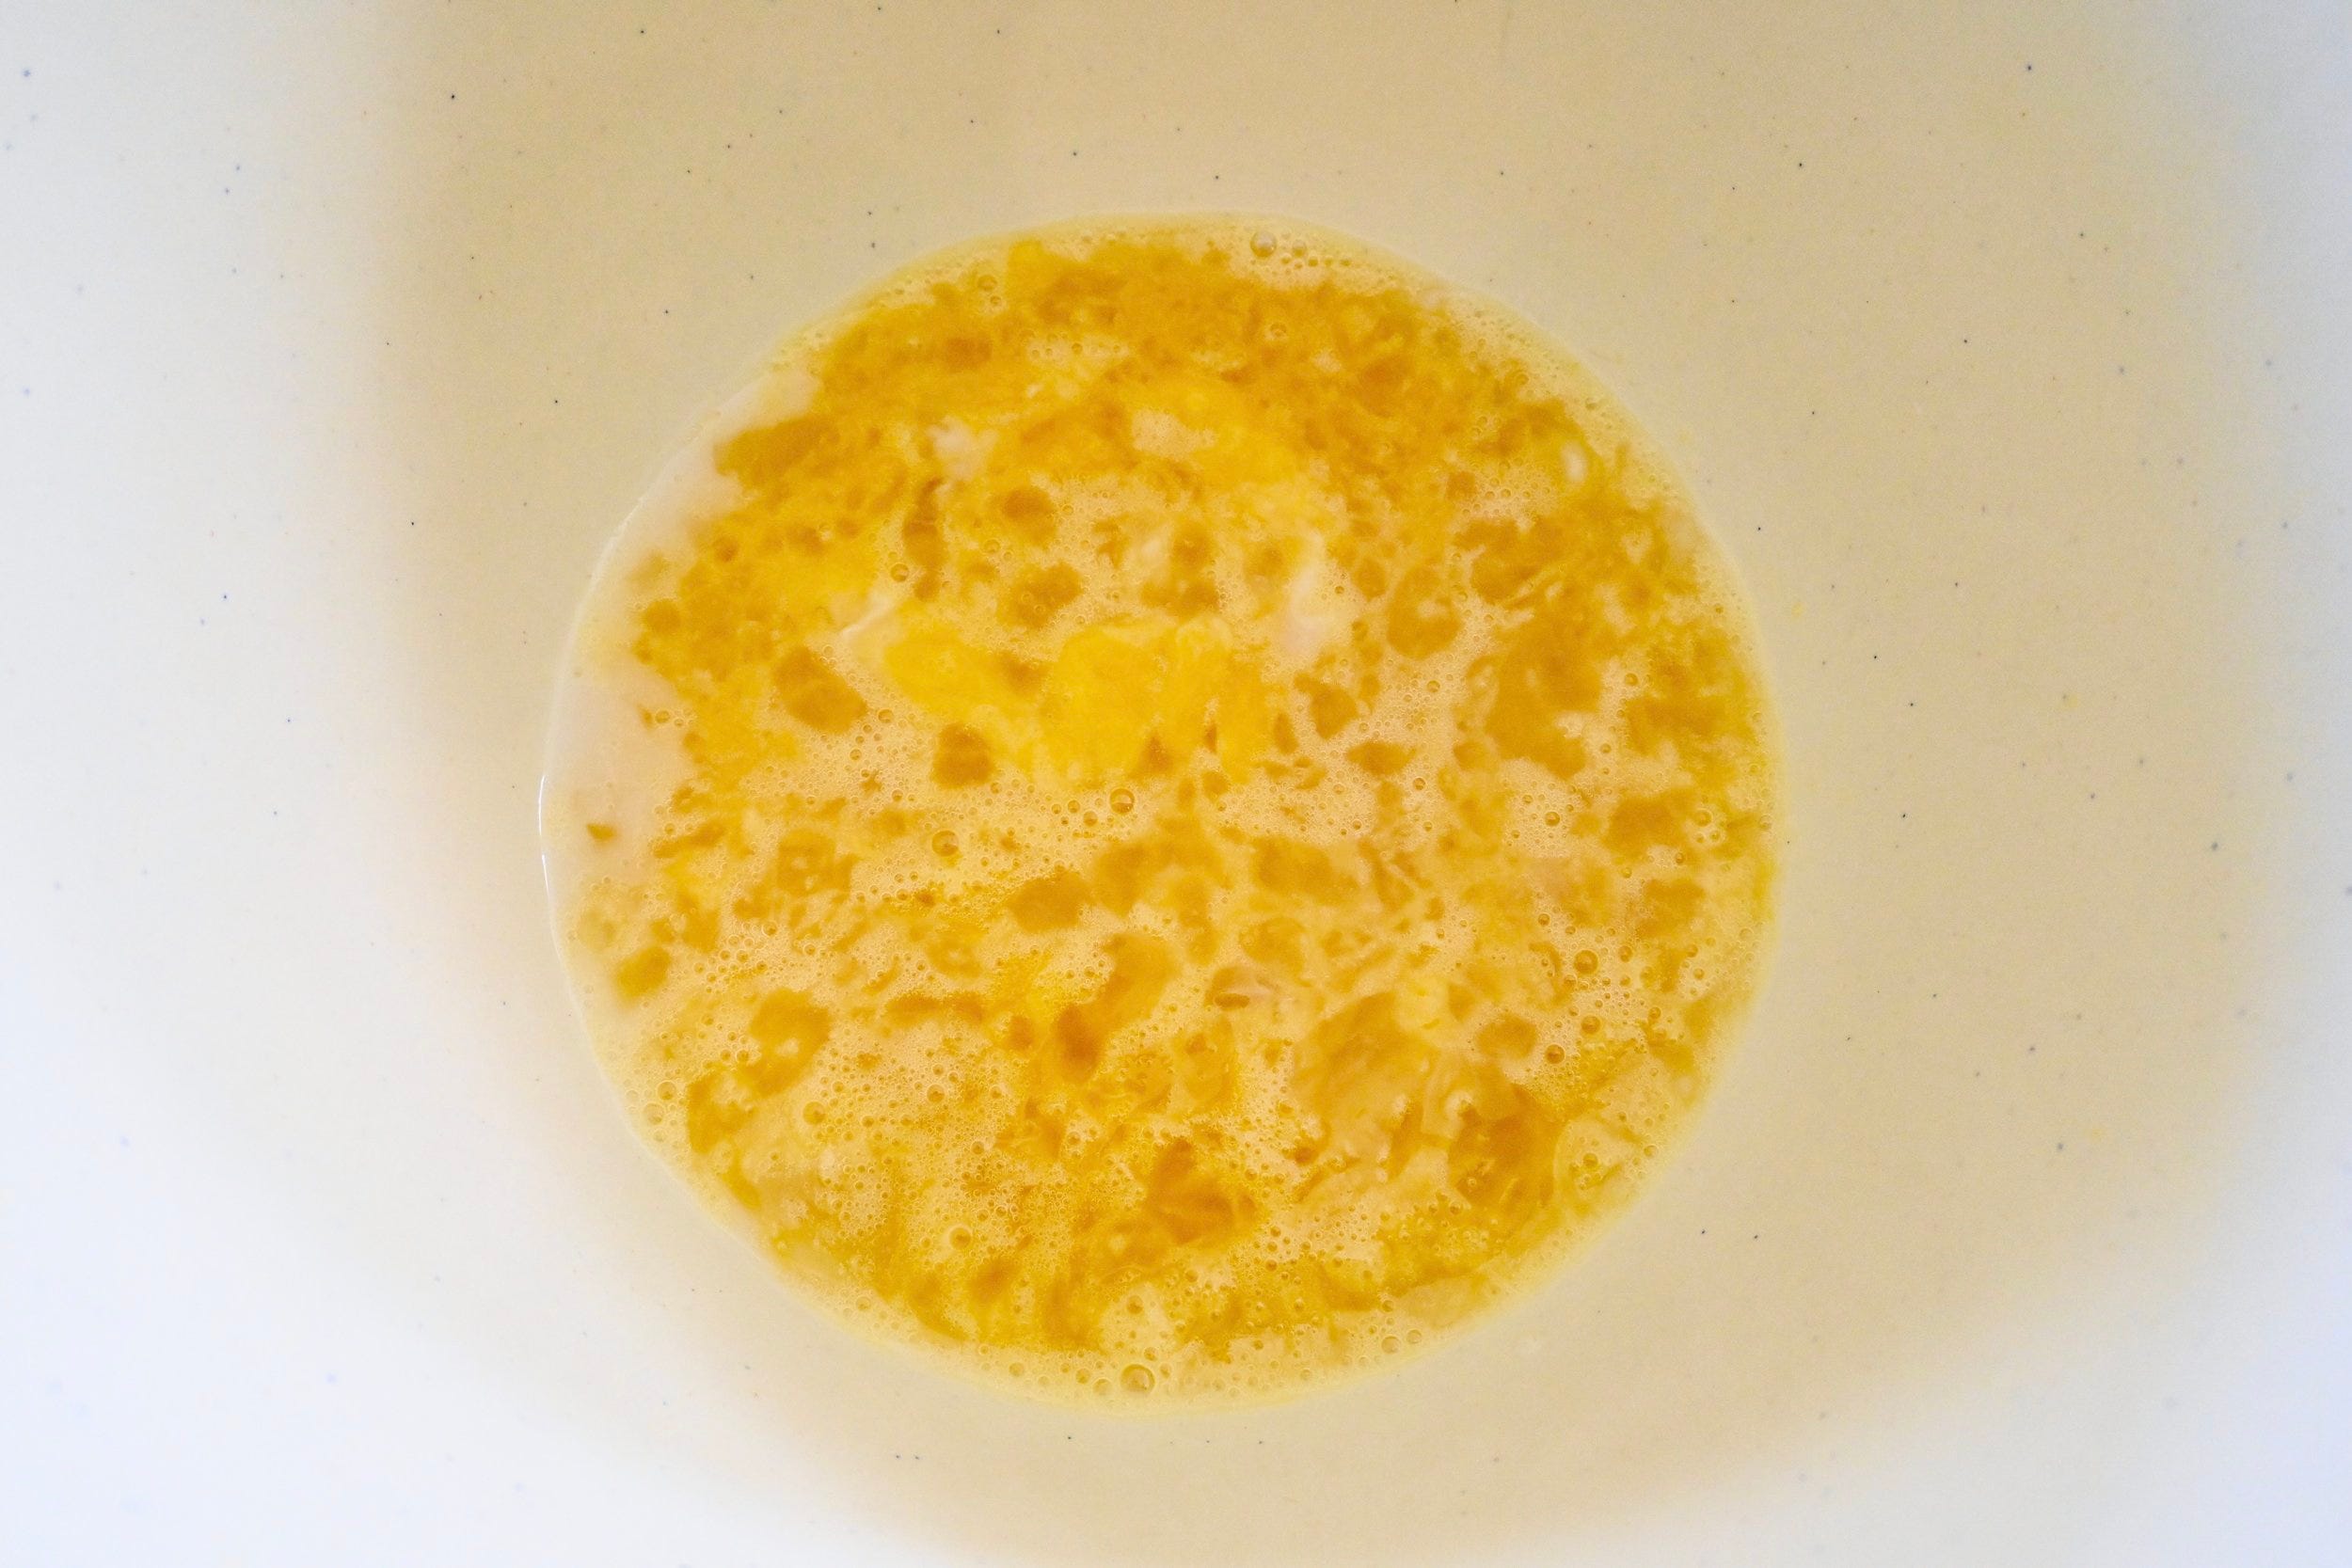
Preheat the oven to 325°F. In a medium bowl, whisk together the eggs, sugar, and vanilla extract until well combined—be careful not to over-whisk or create too many bubbles. Set aside.

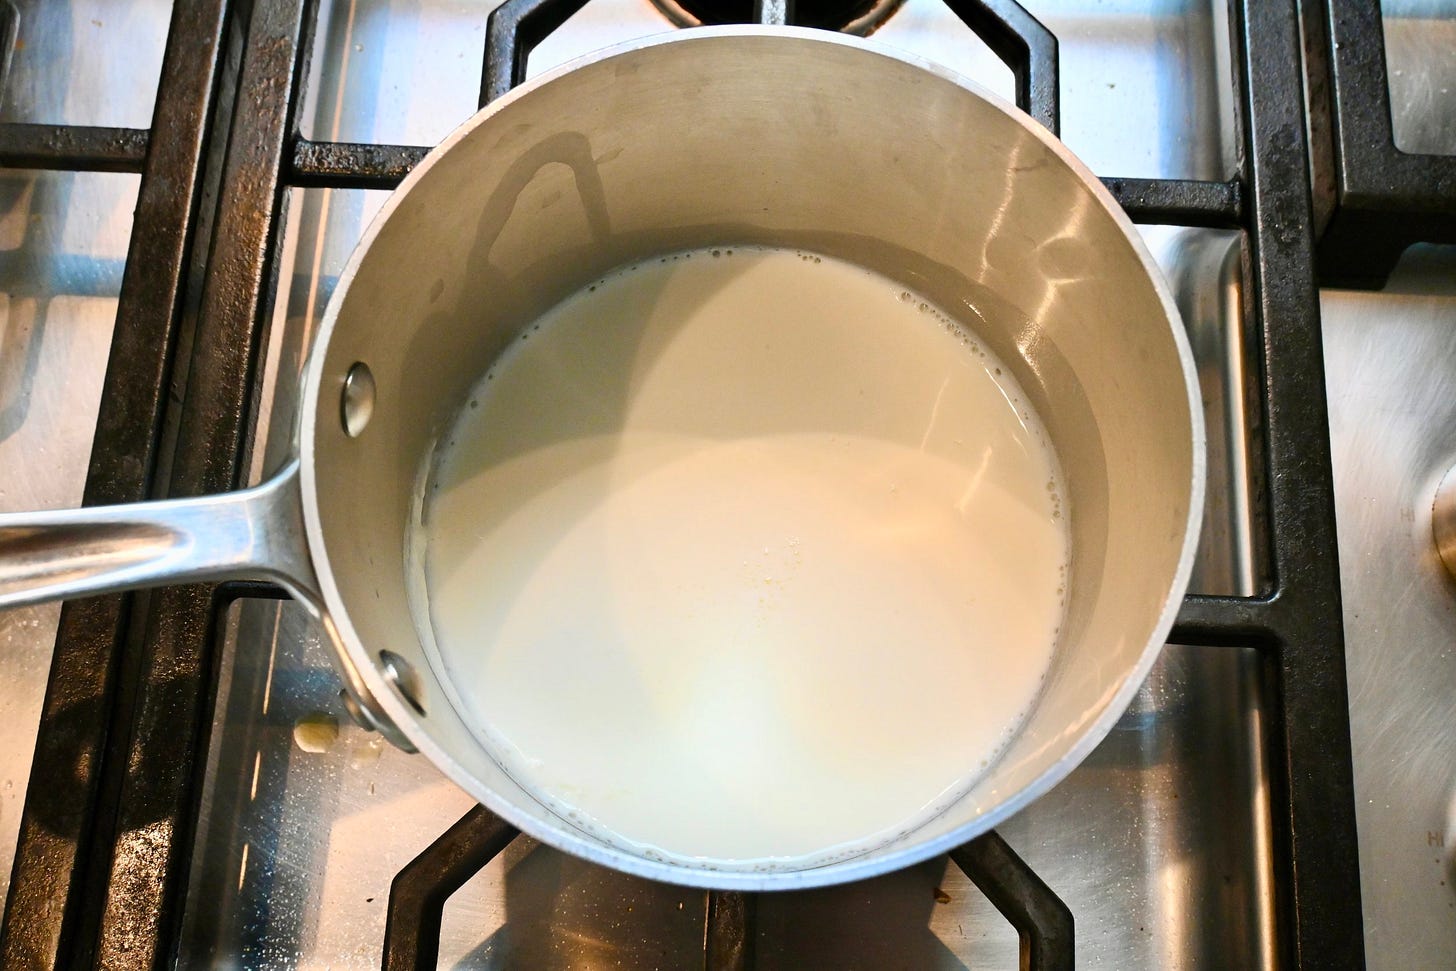
Pour the milk into a small saucepan and set it over low heat. Gently warm the milk until it reaches a low simmer—do not let it come to a boil. Once small bubbles begin to form around the edges, remove the pan from the heat immediately.
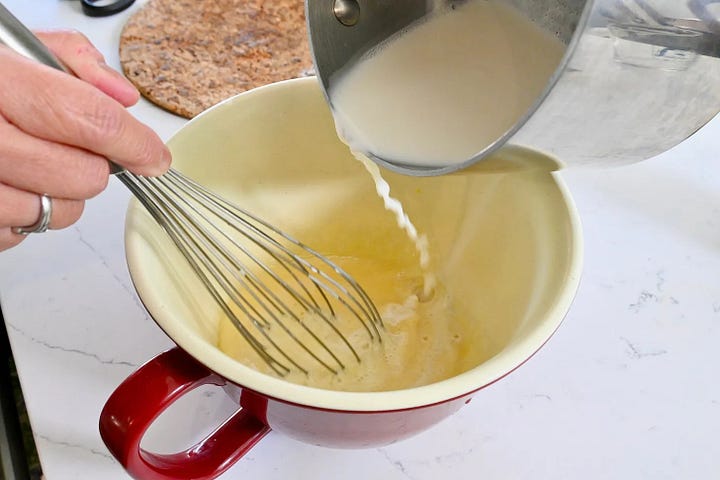
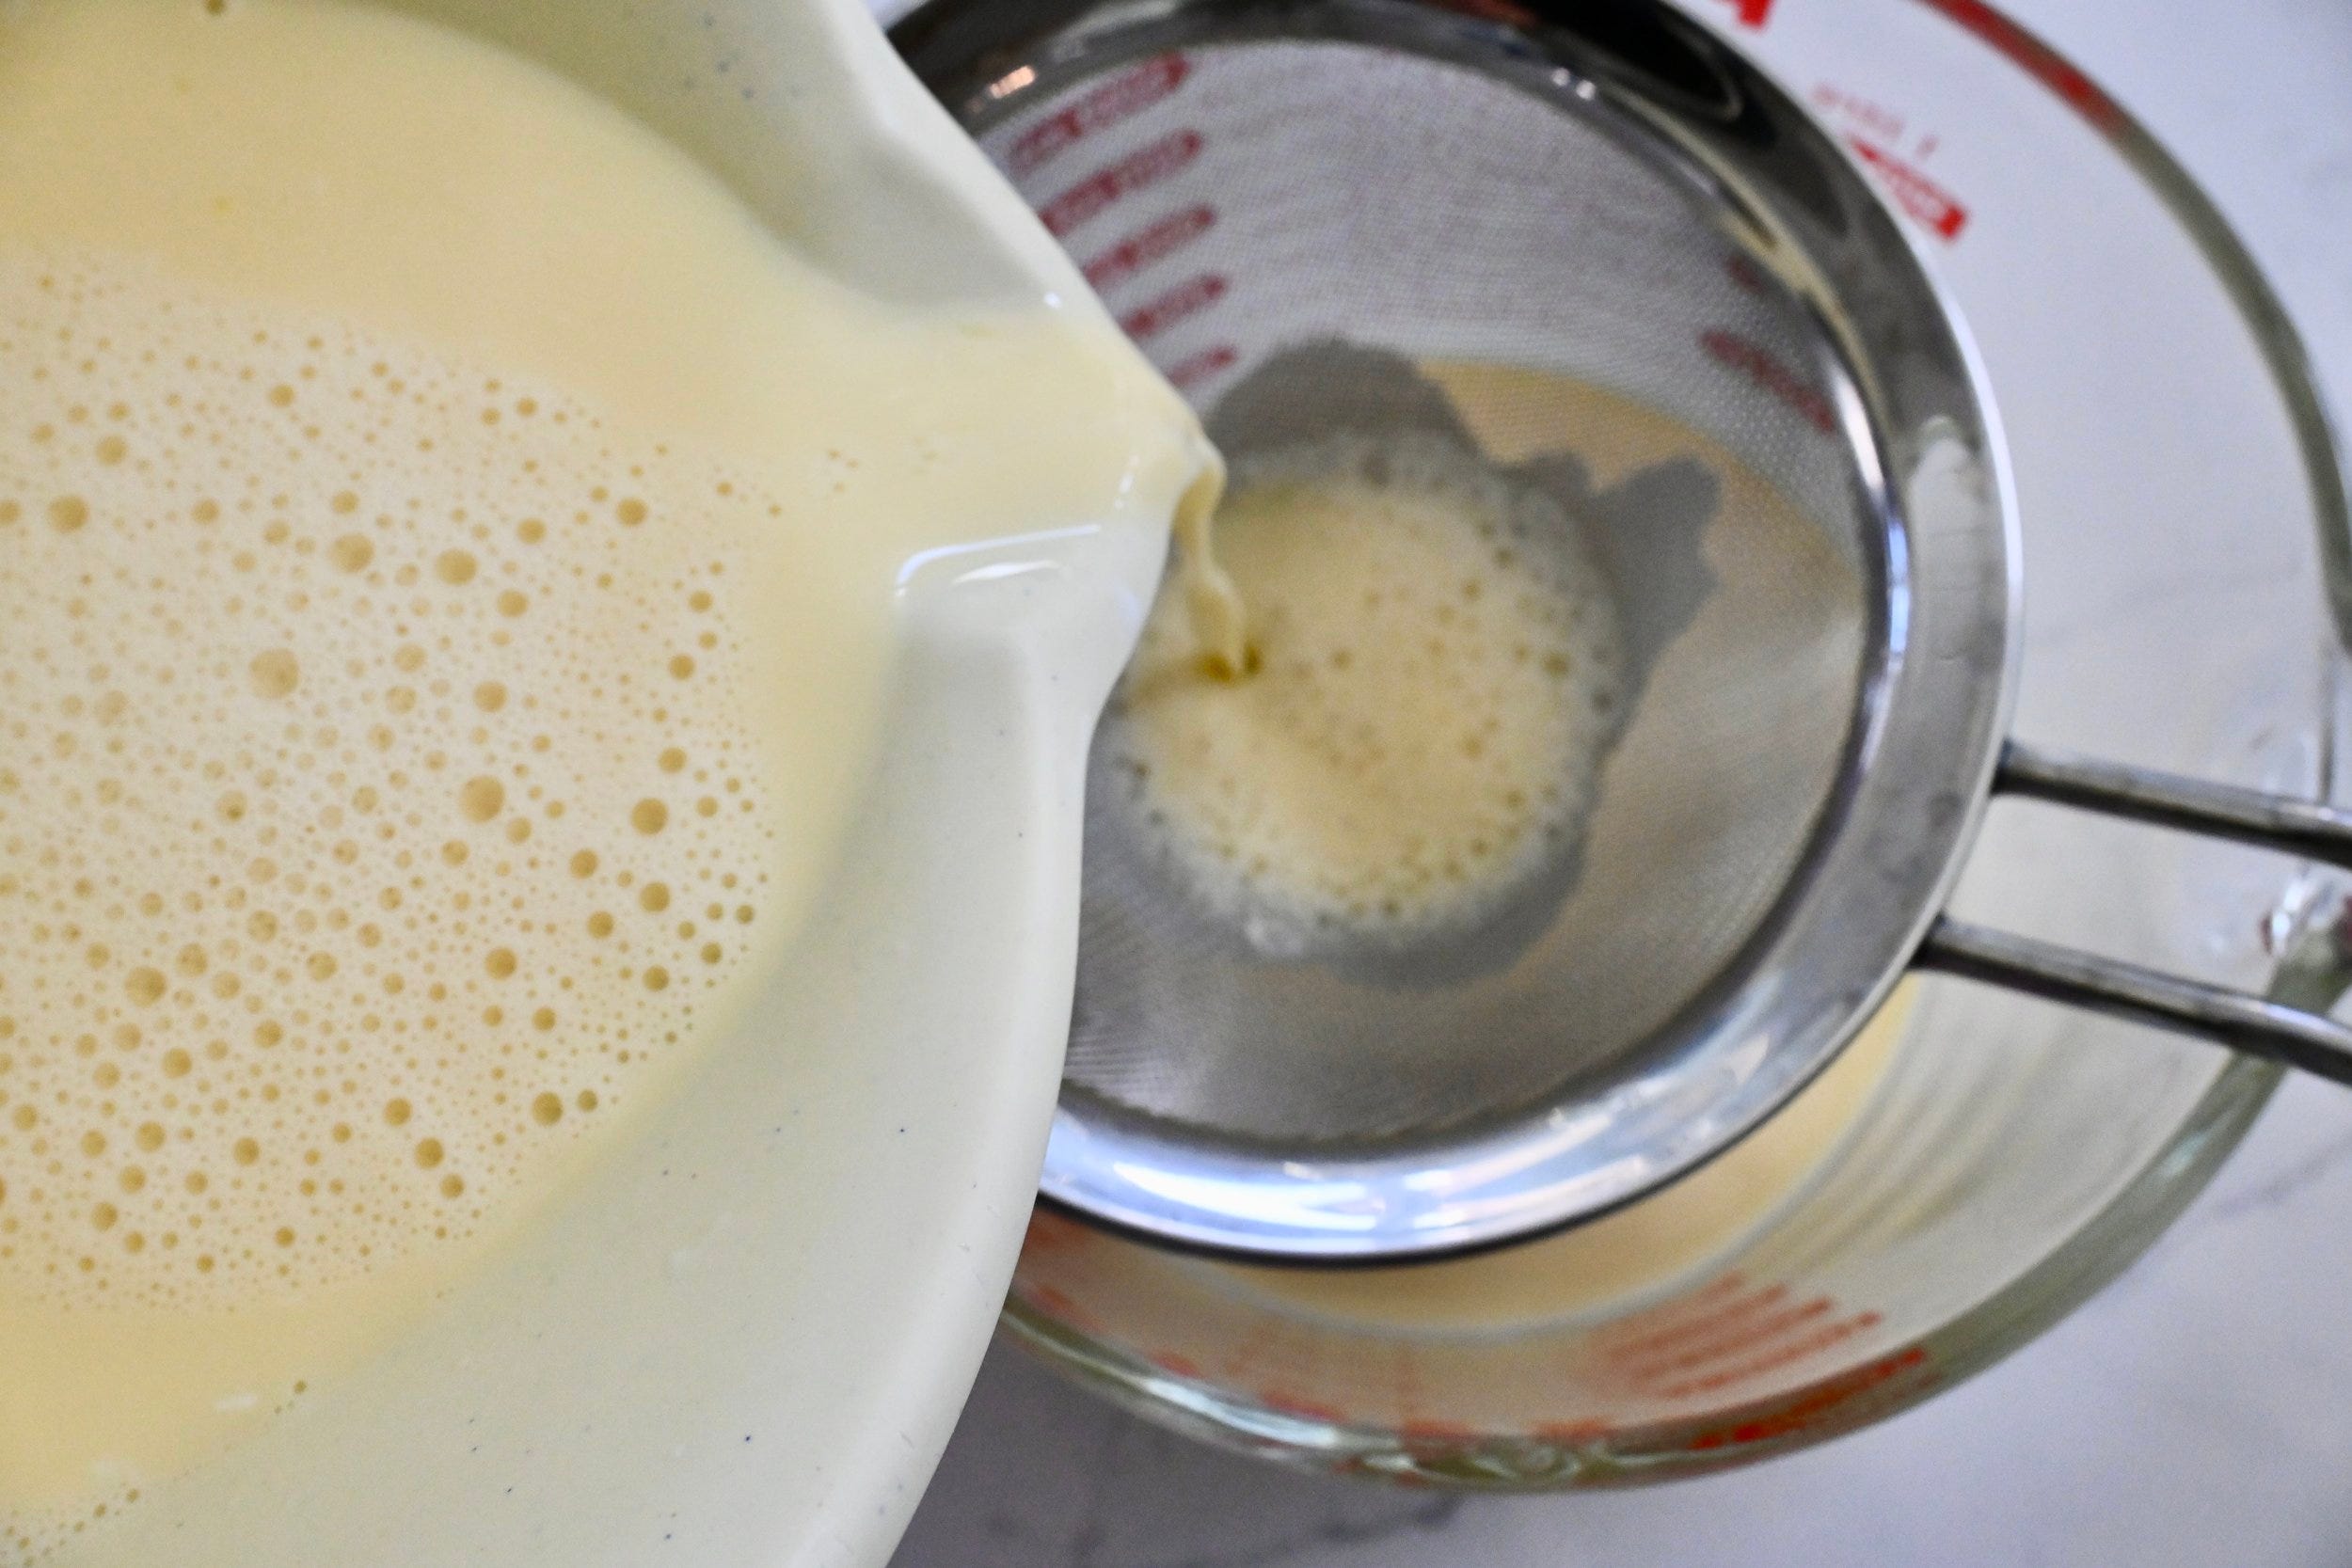
Slowly pour about 1/4C warm milk into the egg mixture while whisking vigorously—this helps temper the eggs and prevents them from curdling. Gradually add the rest of the warm milk in a slow, steady stream, whisking constantly until fully combined. Be sure not to add the hot milk all at once, or the eggs may scramble.
Pour the custard mixture through a fine mesh strainer into a clean bowl. Gently stir the strained mixture to help it pass through—this step ensures a silky-smooth texture by removing any bits of cooked egg or foam.

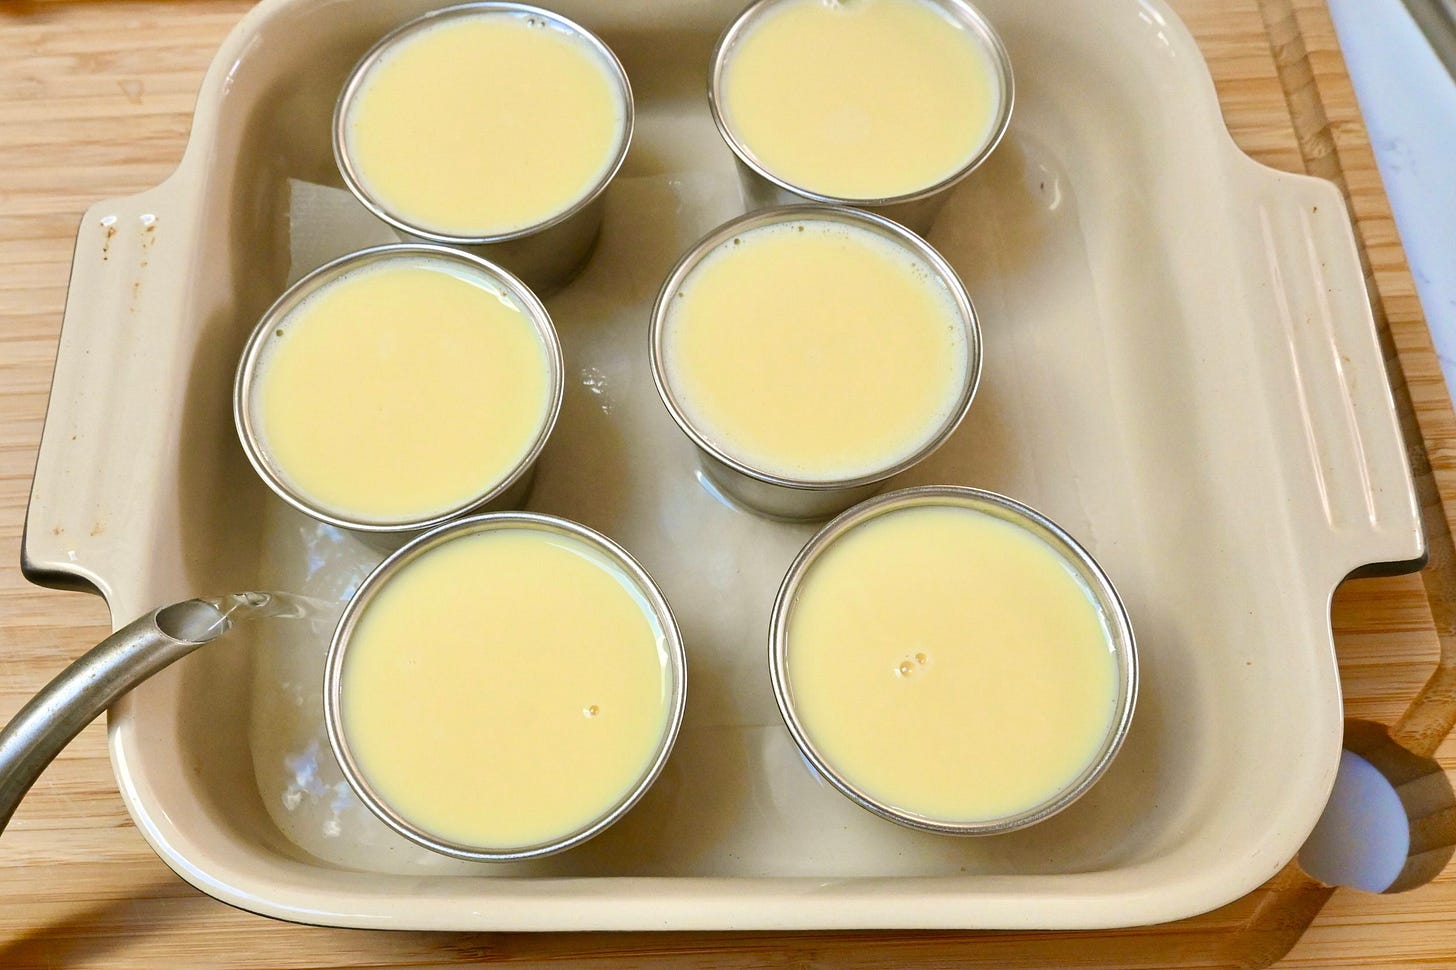
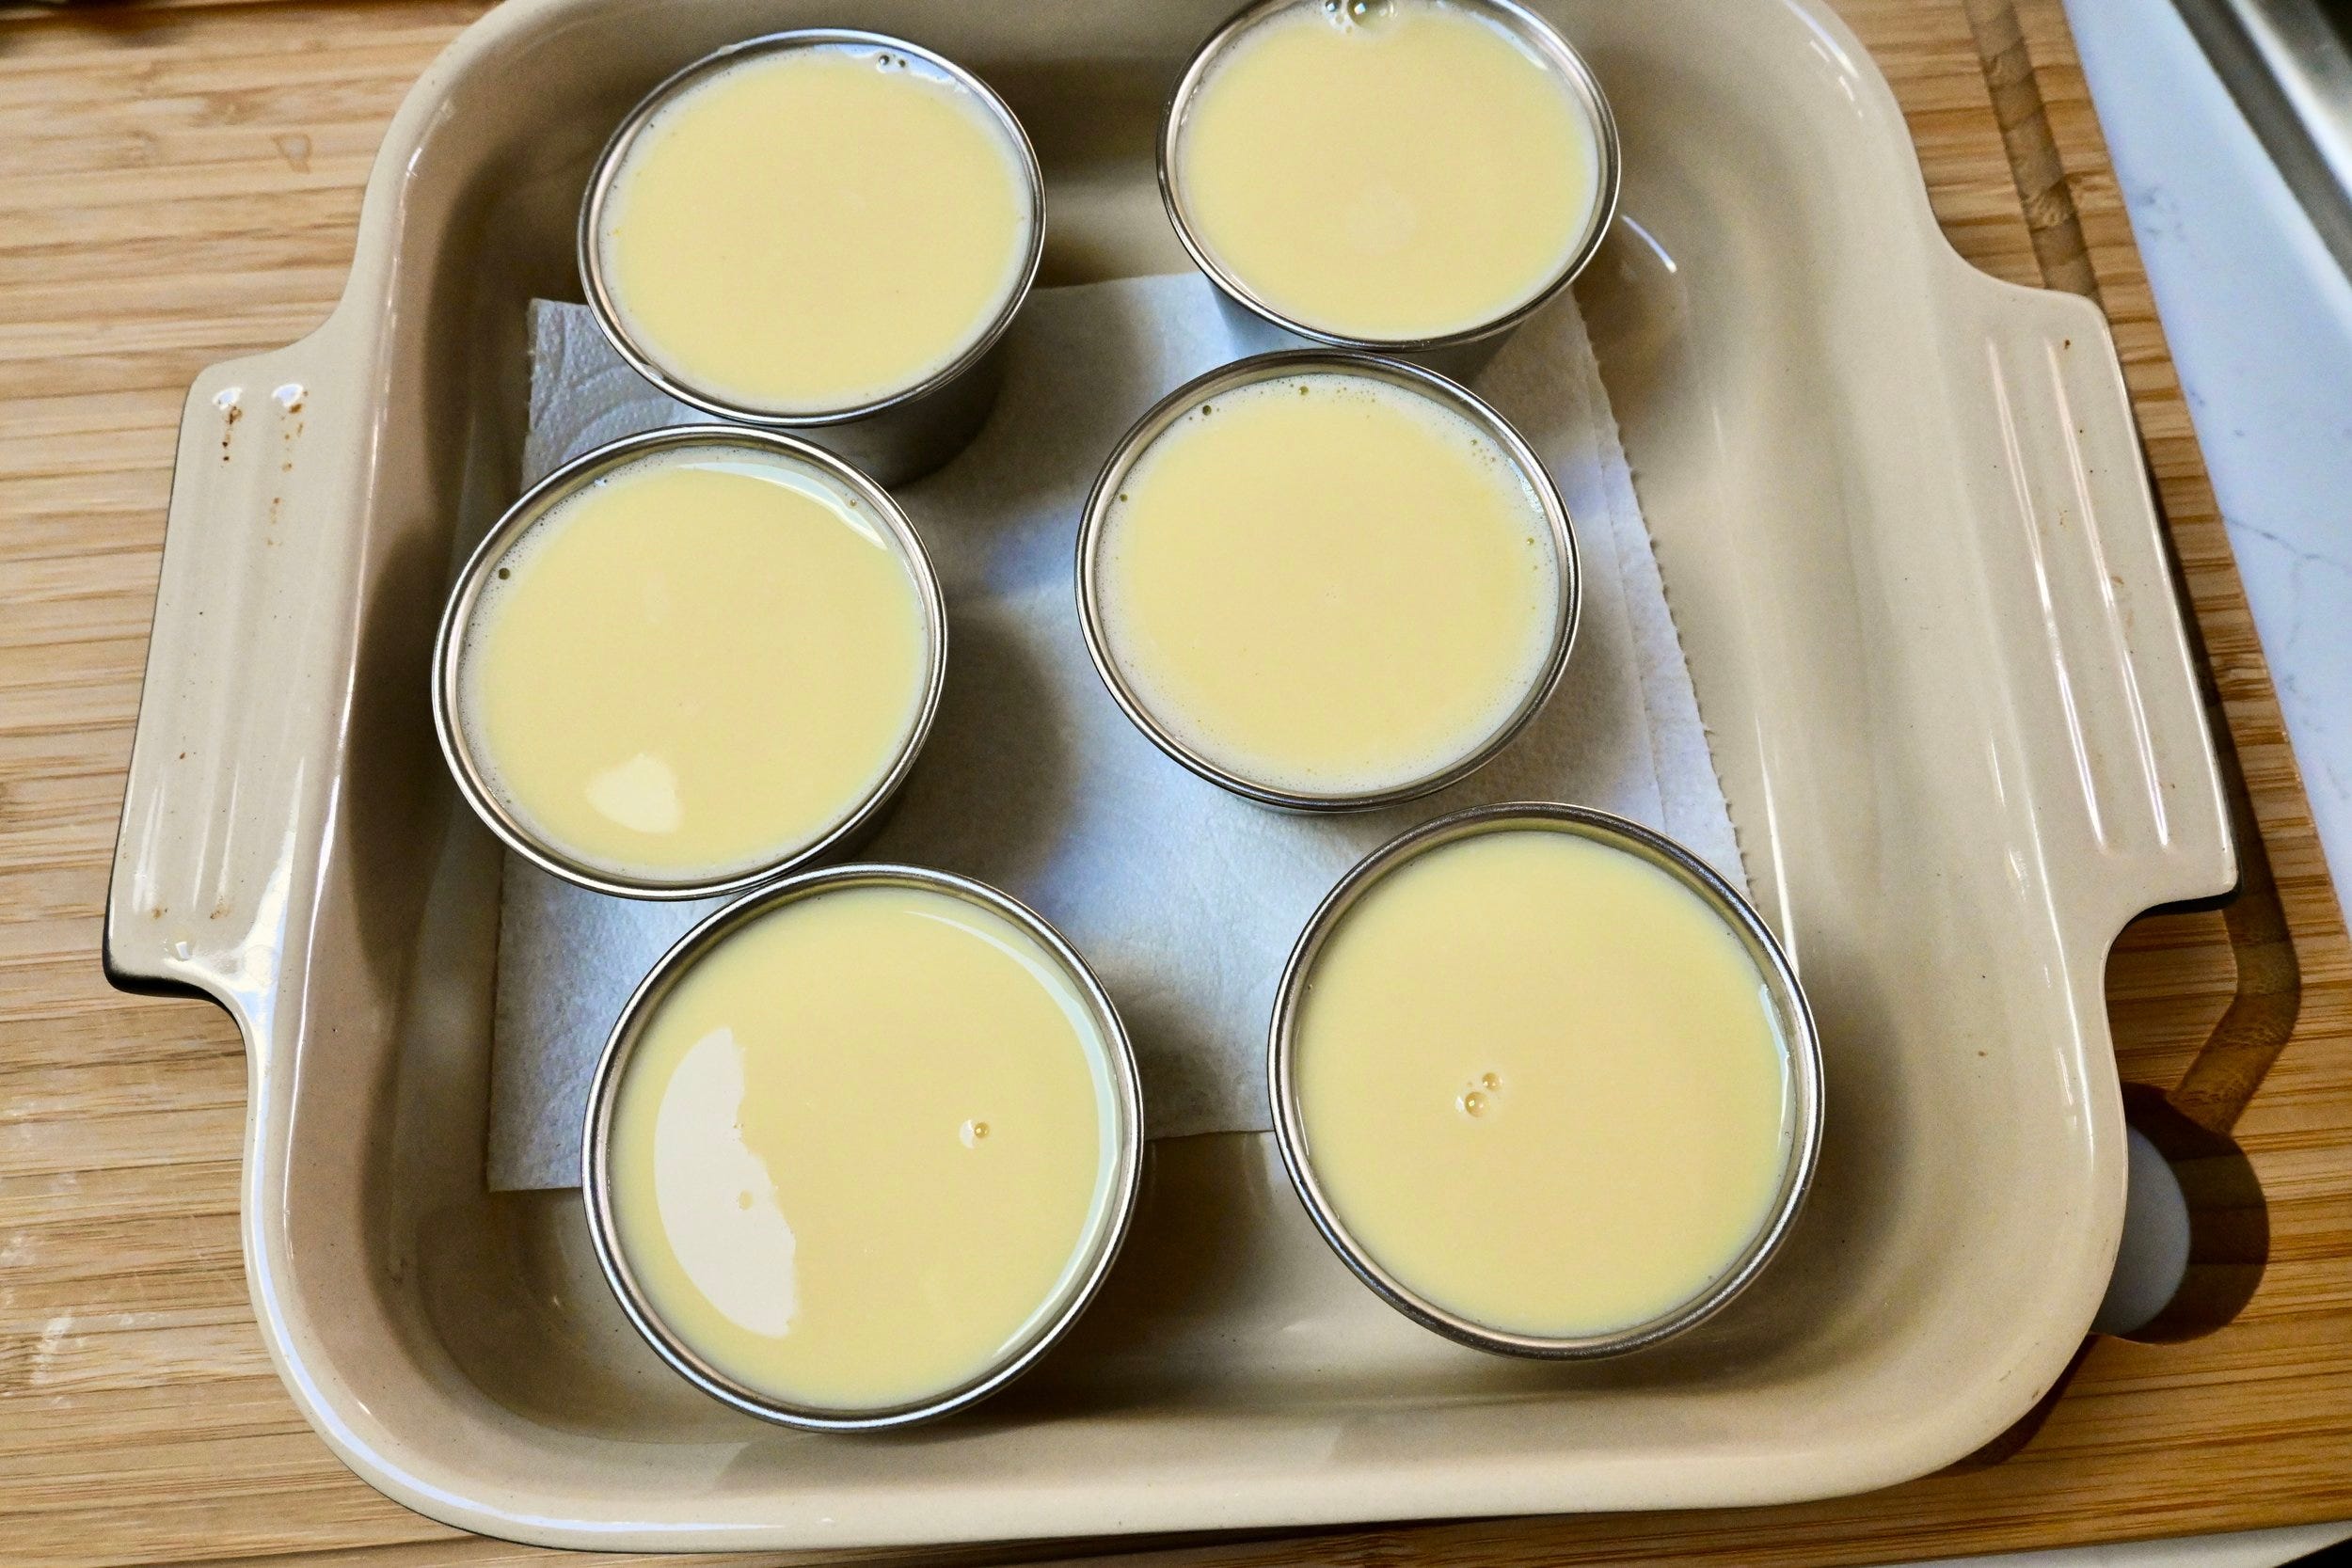
Evenly pour the custard mixture into 6 custard molds. Line the bottom of a baking dish with a paper towel, then place the molds on top. (My mom always used this trick—the paper towel helps keep the molds from sliding around when transferring the dish in and out of the oven.)

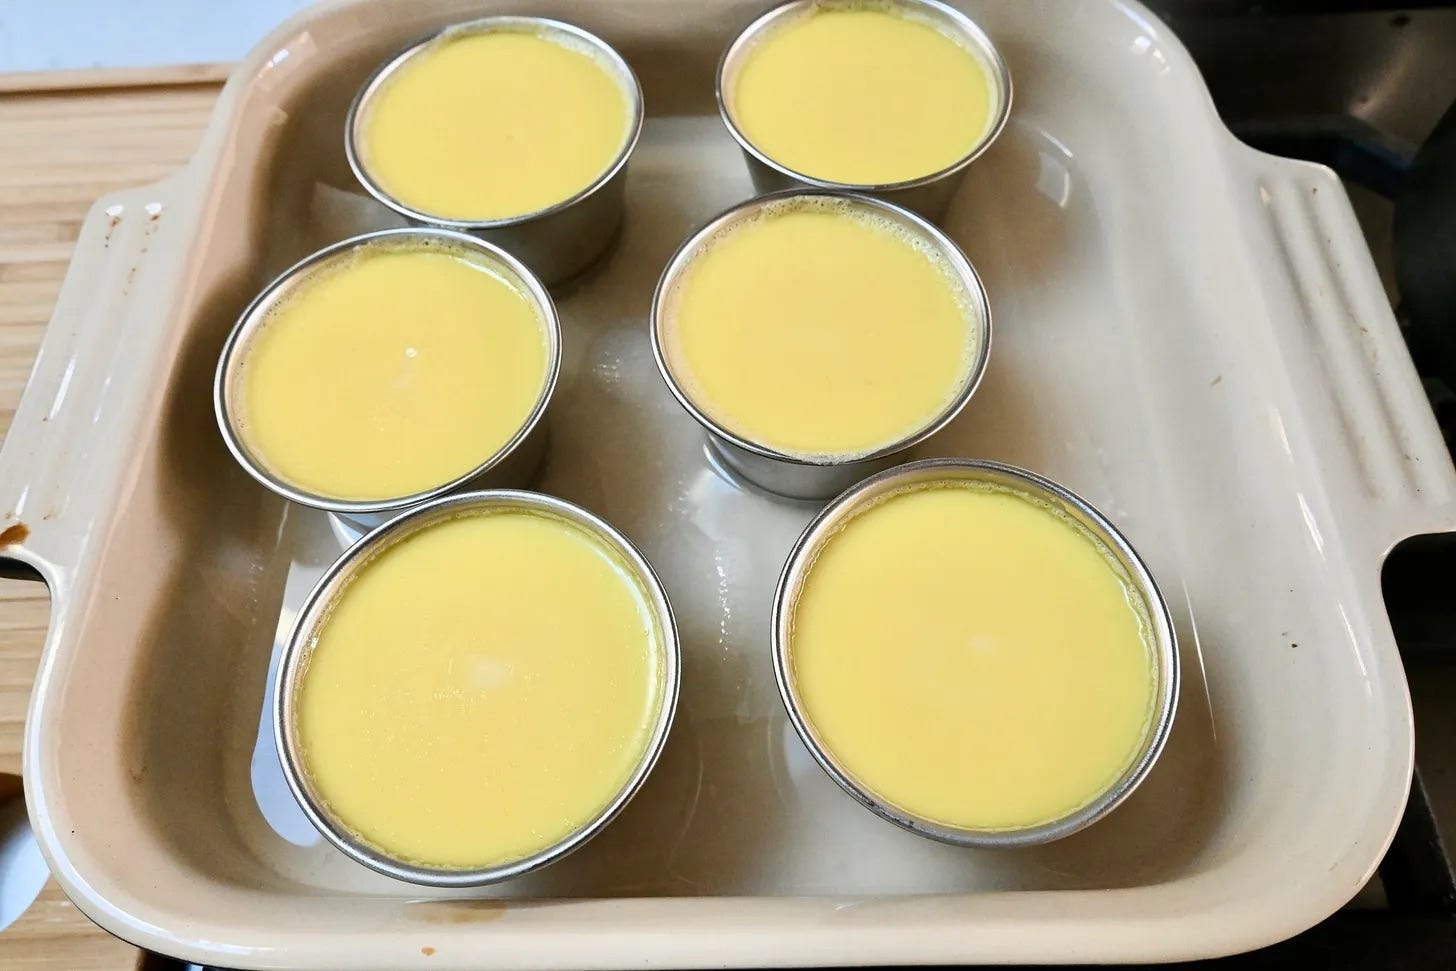
Carefully pour hot water into the baking dish, filling it to about 1~2 inches deep, creating a gentle water bath. Transfer the dish to the oven and bake for about 30 minutes, or until a toothpick inserted into the center comes out clean.
(My mom used to gently tilt the mold to check doneness—if the custard jiggles slightly but no liquid seeps from the center, it’s ready. If you’re unsure, the toothpick method is a good backup!)
Once baked, carefully remove the molds from the water bath and transfer them to a wire rack. Let them cool for about 10 minutes, then refrigerate for at least 1 hour, or until fully chilled.

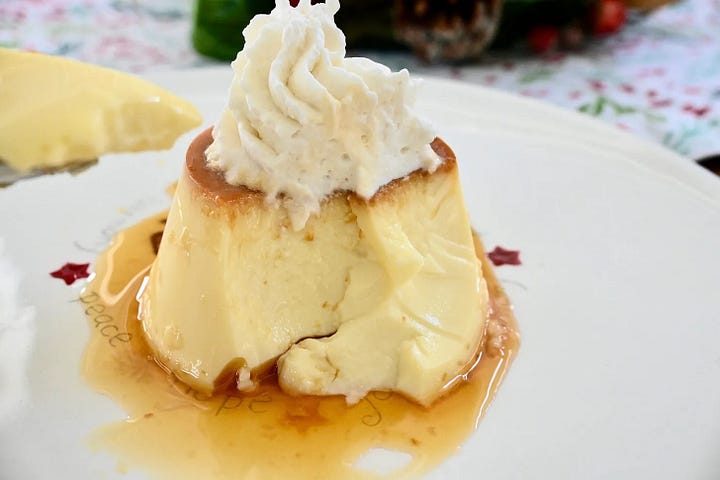
To serve, run a thin knife around the edge of each custard to loosen it. Place a serving plate on top of the mold and quickly—but gently—flip it over to release the purin. (Don’t worry if the tops have little cracks—since you’re inverting the custard, no one will ever see them!)


Disclaimer Note: We're all about sharing here! But please credit recipes and photos if you choose to send these along.
My favorite dessert!!